Payroll Calendar Overview
A Payroll Calendar is a structured tool that schedules payroll cycles, defining key dates such as paydays and the events leading up to them. It helps you manage timely, accurate, and consistent payroll processes throughout the year.
Each payroll calendar is linked to a legal entity and can be tailored to align with specific payment frequencies, holidays, and organizational needs.
Create Payroll Calendar
To create a new Payroll Calendar, you need to go to the navigation menu, under the Payroll section click on Payroll calendars -> New Payroll Calendar.

Step 1 - Configuration
In this step, you need to define the global settings for the payroll calendar. These settings include:
-
Legal Entity: Select a legal entity your payroll calendar is associated with.
-
Calendar setup:
-
Payroll Calendar Year: The calendar year for which the payroll cycles will apply.
-
Payroll Calendar Name: A custom name for the calendar.
-
Payroll cycle: Define the payroll frequency. There are three options:
- Monthly: One pay day per month. Default date for this option is the 25th of every month. This can be configured using the Monthly pay day field.
- Semi-monthly: This template allows two pay days per month. The default dates for this option are the 15th and 31st of each month. These dates can be customized using the First pay day and Second pay day fields.
- Bi-weekly: This option sets a pay day after every two weeks regardless of date or month. For example, a pay day every second Friday.
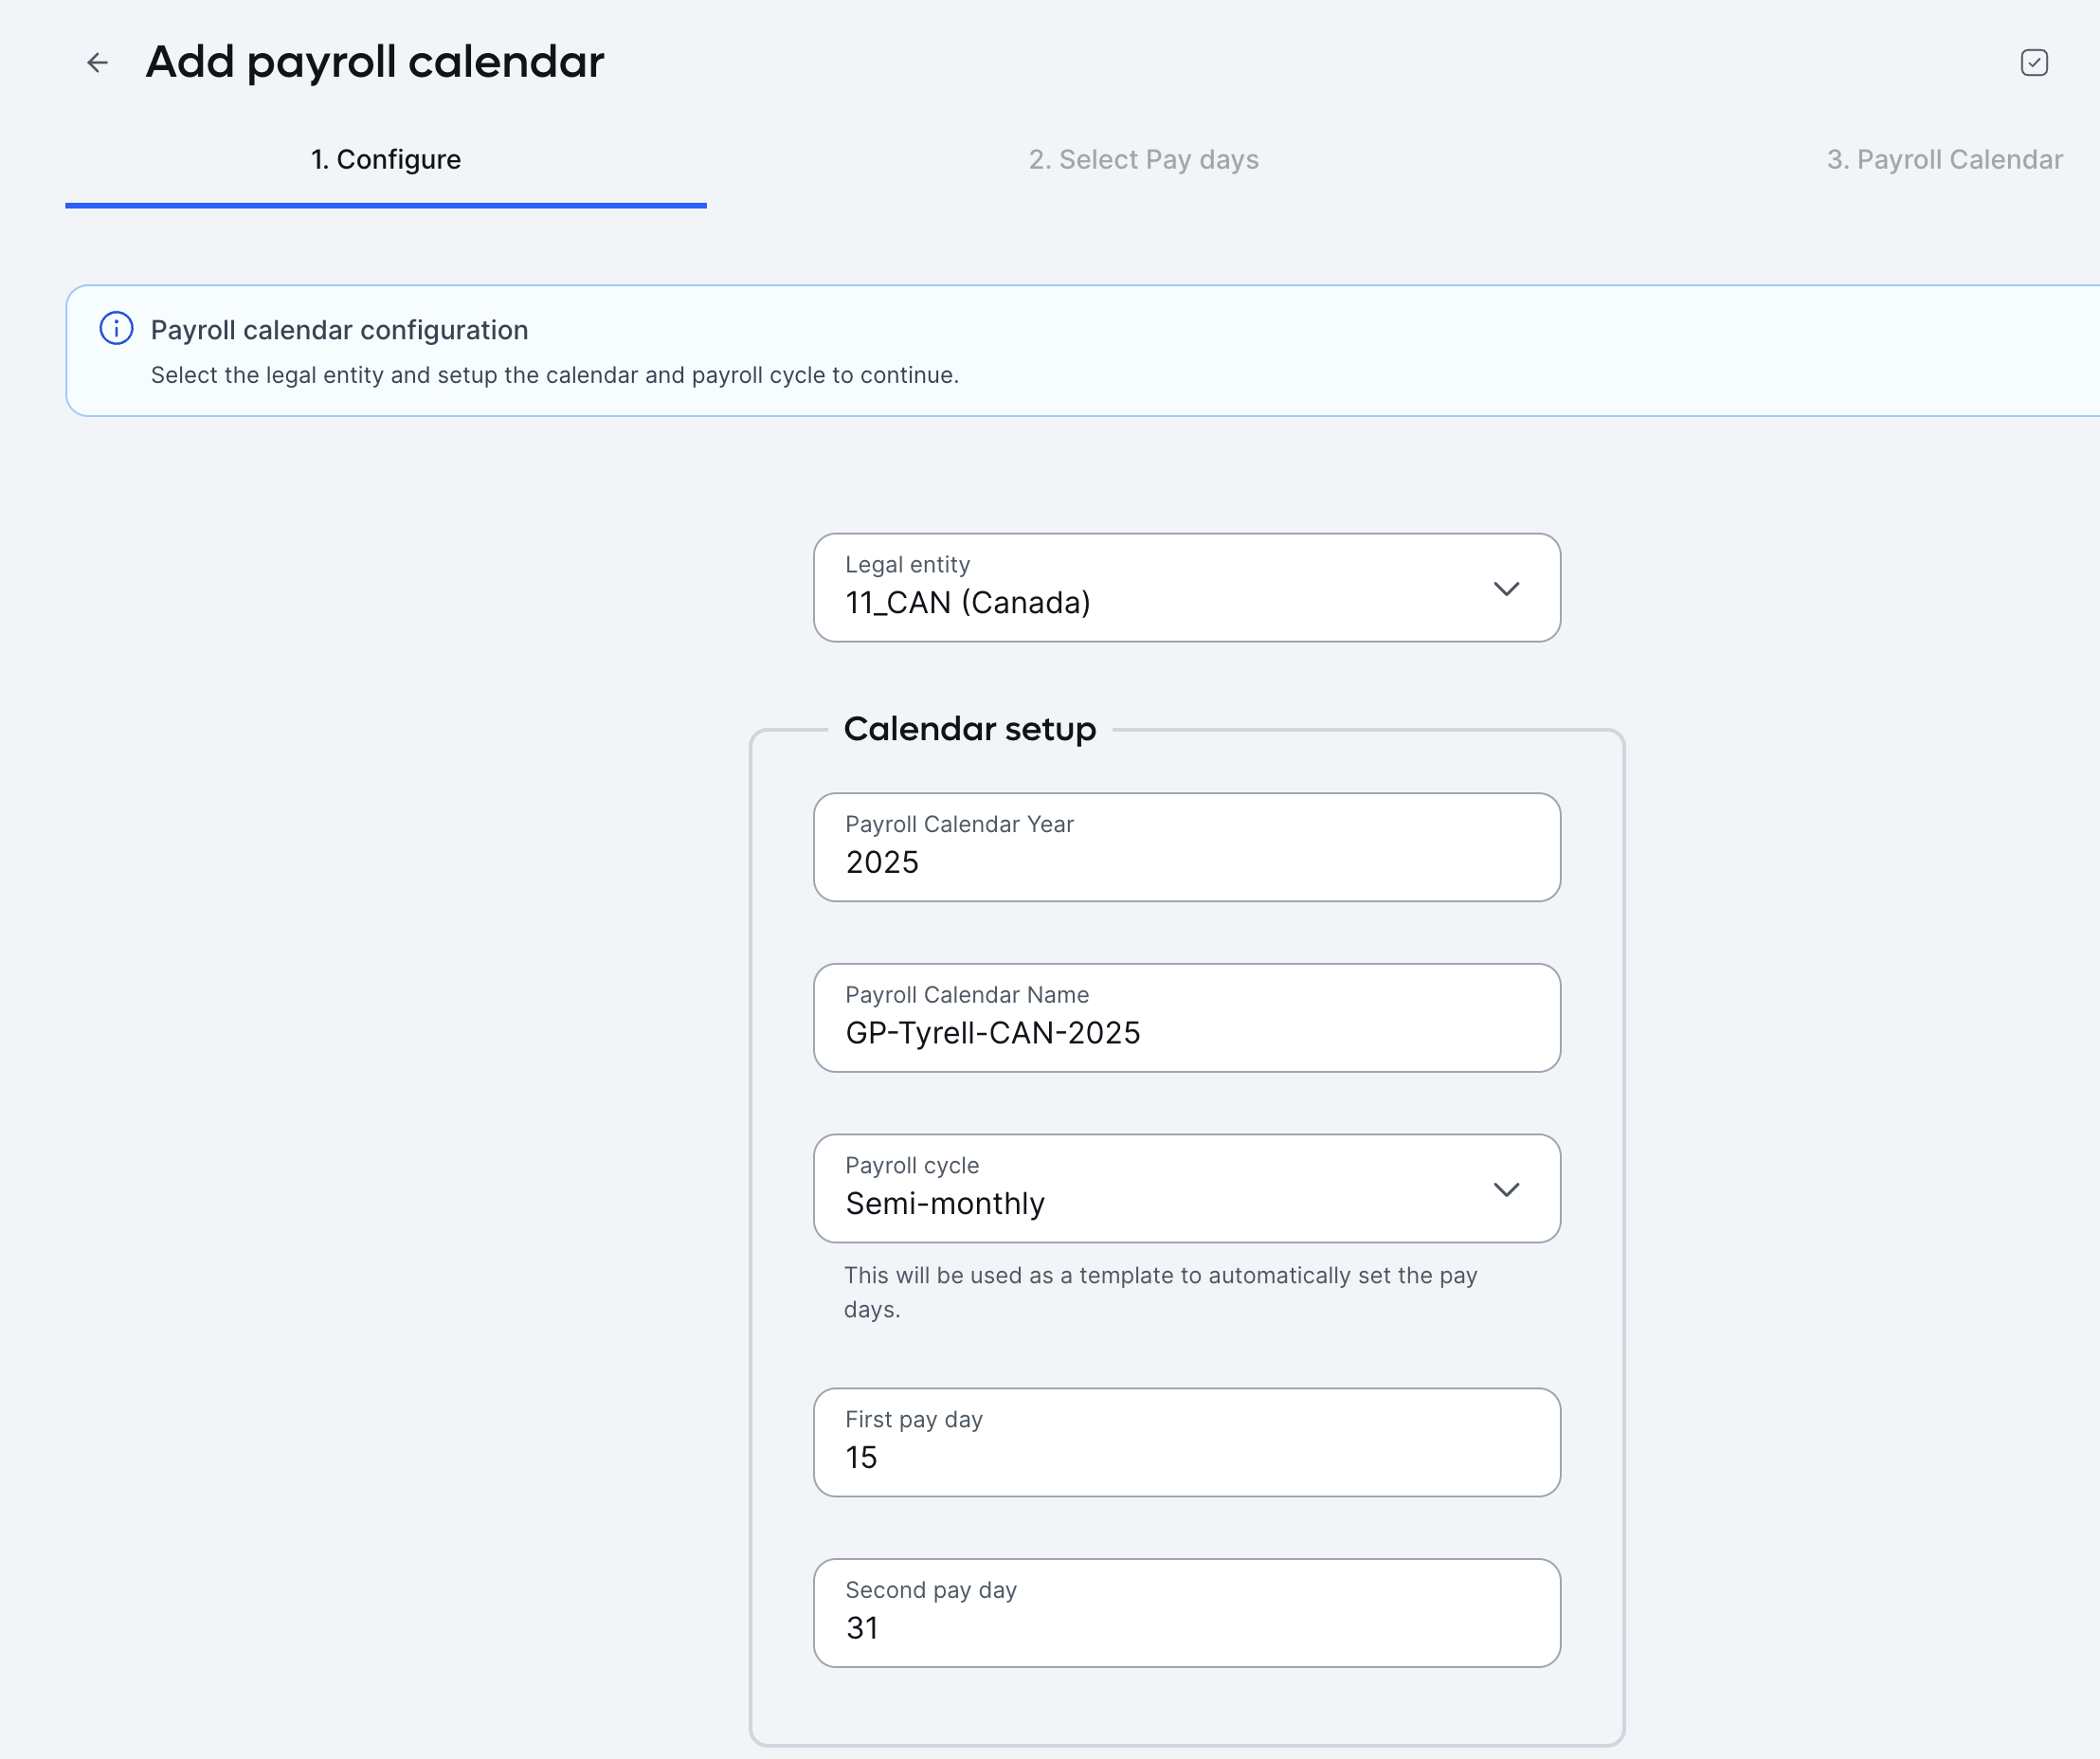
ℹ️ Note that the availability of these options vary depending upon which legal entity you choose.
-
-
Payroll cycle events setup: A toggle that lets you decide whether to choose the default payroll cycle events or customize the duration of each event. These events include:
-
Input cut-off: the last date to accept data for the payroll run.
-
Payroll input review: Duration set for Remote to prepare input and share it with the Payroll Service Provider.
-
Payroll processing: Duration set for the Payroll Service Provider to process payroll and share output with Remote.
-
Payroll output delivery: Duration set for Remote to process and share output with the customer.
-
Approval due: Duration set for customers to approve the output.
-
Payment file preparation: Duration set for Remote to inform of payment approval to the Payroll Service Provider and to request a CSV file creation.
-
Payment file delivery: Duration set for Remote to prepare and share that CSV file with the customer.
-
Customer payment execution: Duration set for the customer to share the CSV file to their bank.
The default value for all these events is set to 1 day, but can be customized as per the organization's needs. Whatever durations you set are collected backward from the selected payday.
-
-
Subscribe: Lastly, you can subscribe to this calendar to get notified every time a new run is created.
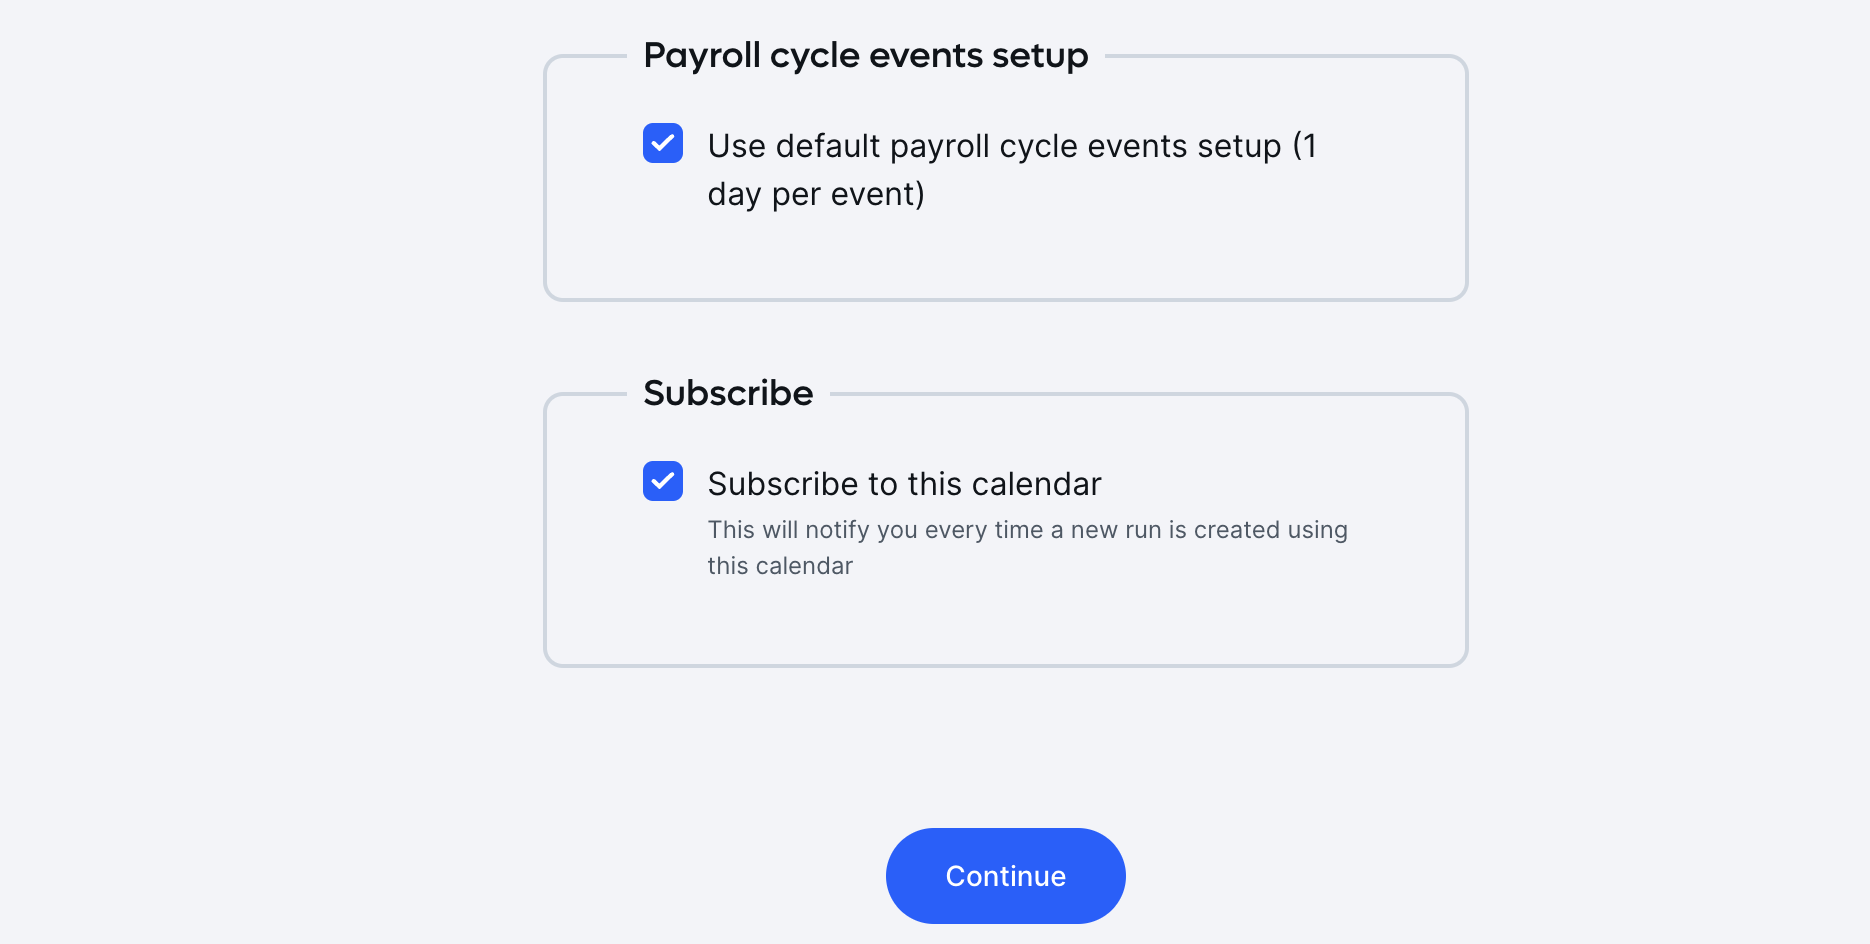
Click Continue to proceed to the next step.
Step 2 - Select Paydays
The second step in creating a new Payroll Calendar is to set paydays. As discussed in the previous step, a few standard dates are automatically set as paydays based on the template you choose, but here you have an option to customize these dates to meet your company's needs.
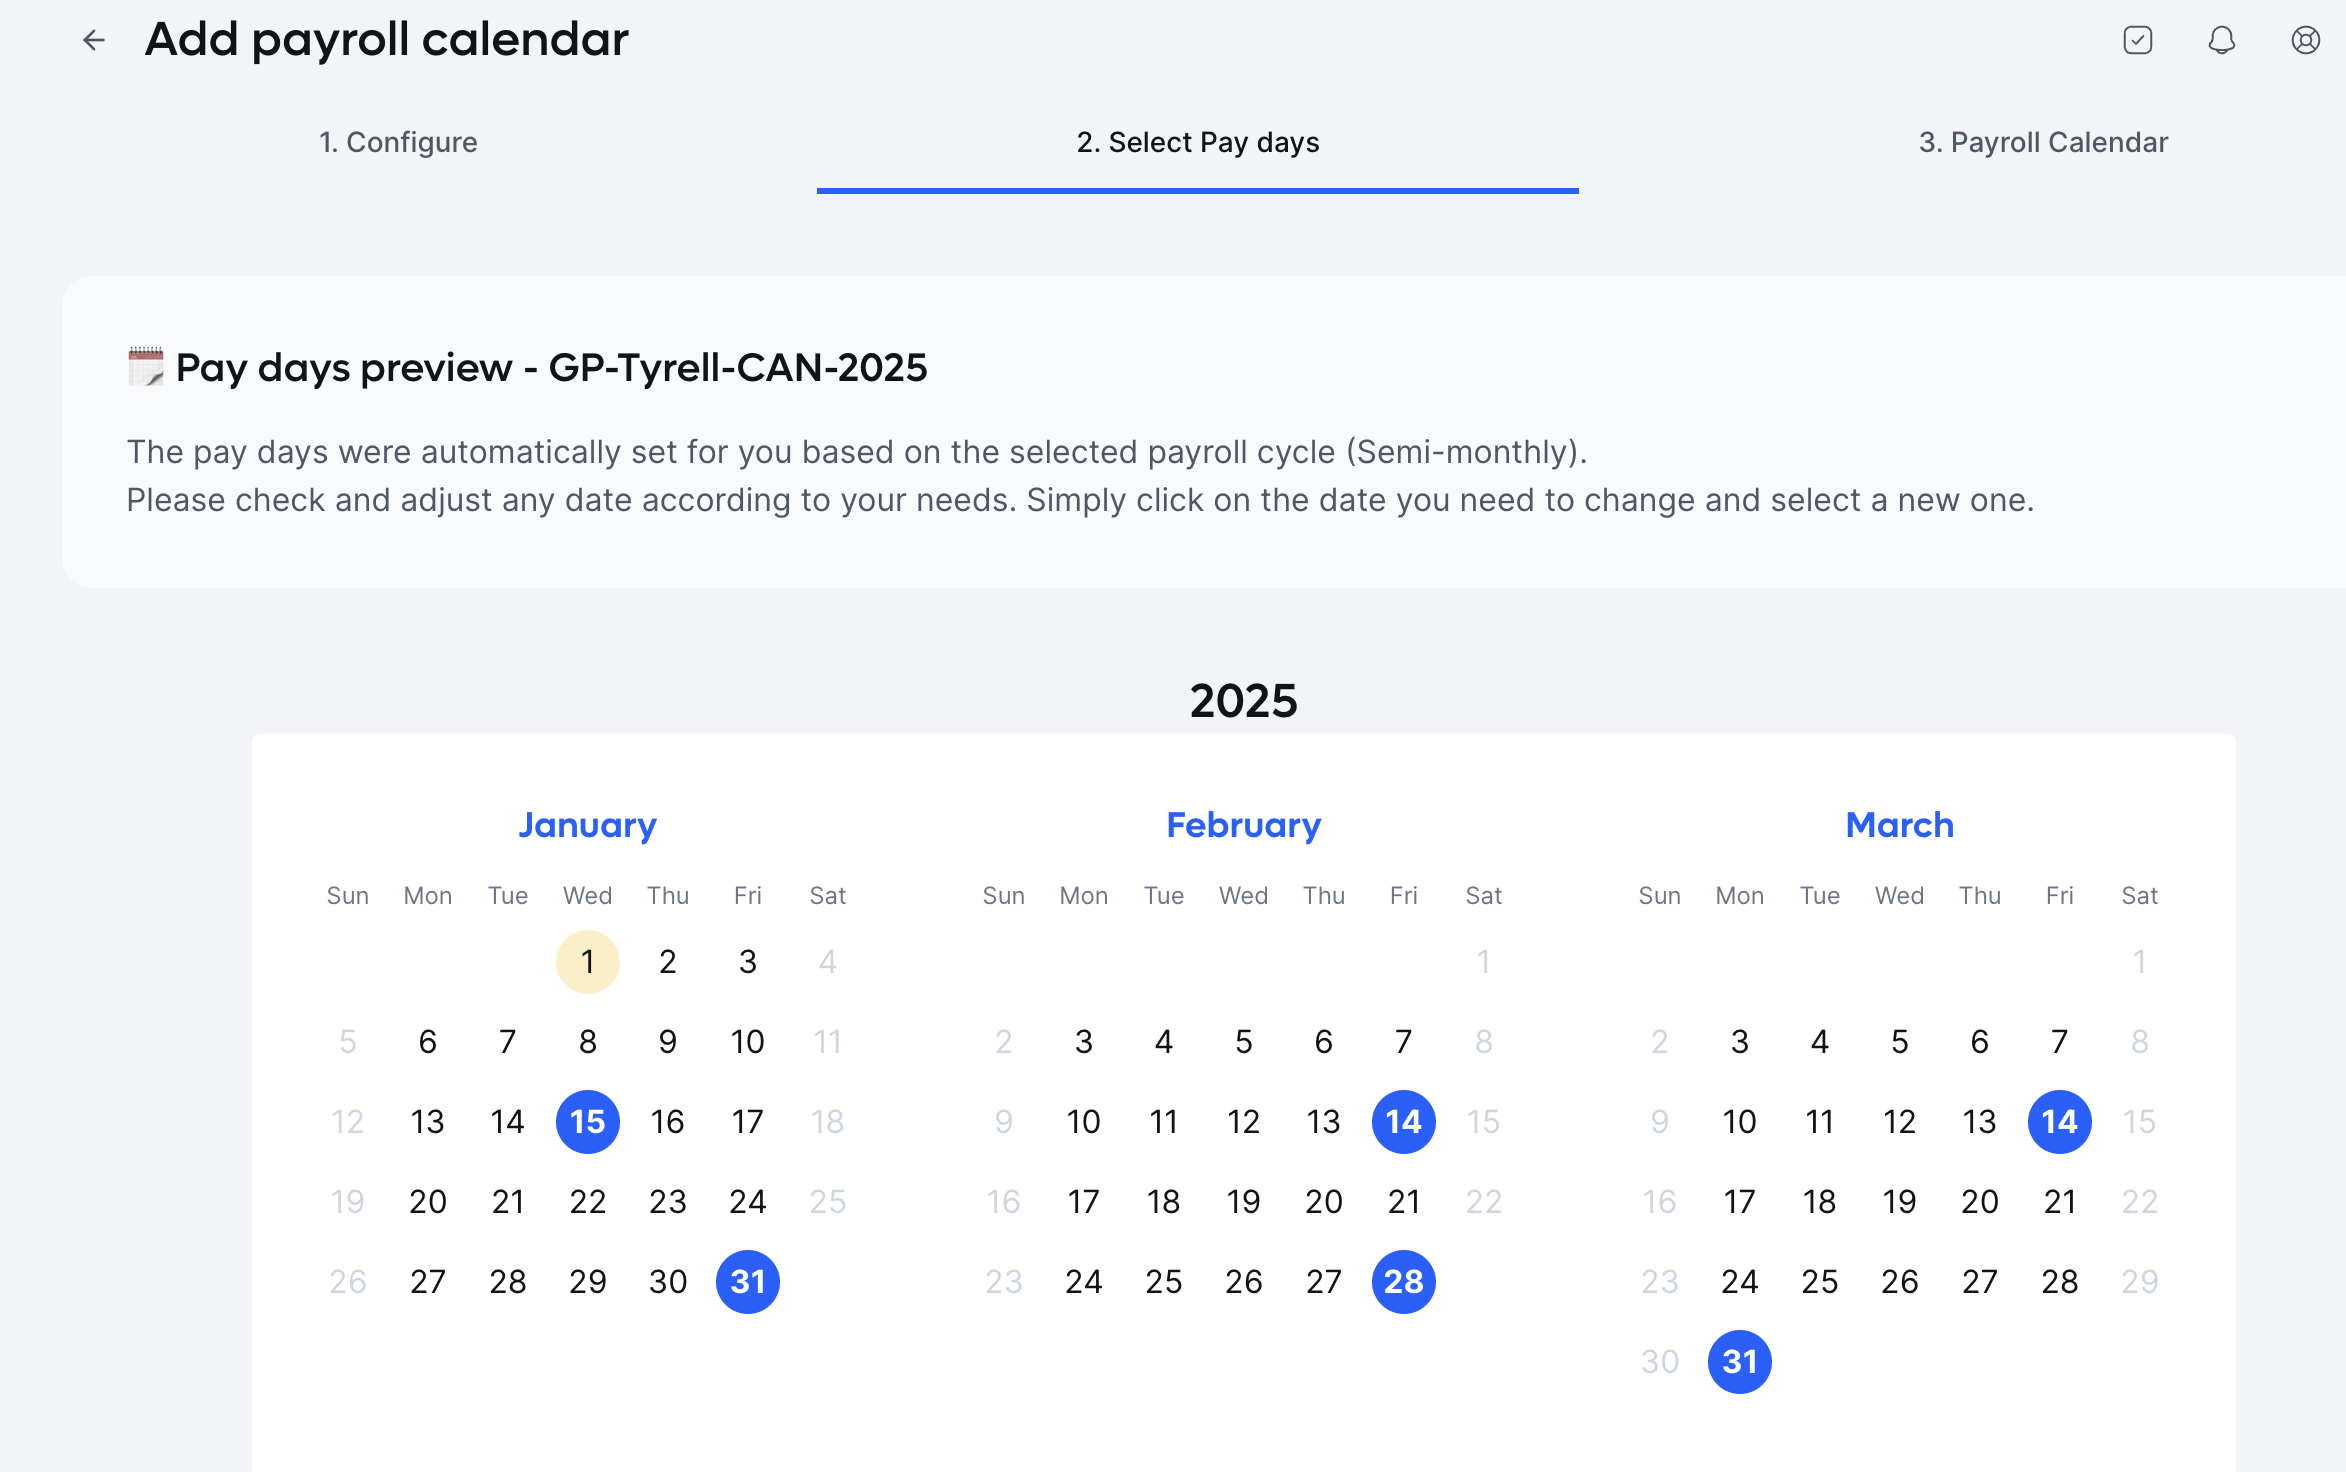
In the calendar, you will notice lightly highlighted dates which represent holidays based on the legal entity chosen for a country. If you hover over them, you will get a tooltip describing the holiday.
ℹ️ If a payday falls on a weekend or holiday, it will be adjusted to the nearest working day.
Step 3 - Confirmation
In the final step, a detailed grid is presented with all payroll cycles and their associated event dates. In this grid, you can:
- view and edit event dates for specific payroll cycles.
- see adjustments reflect across related dates automatically.
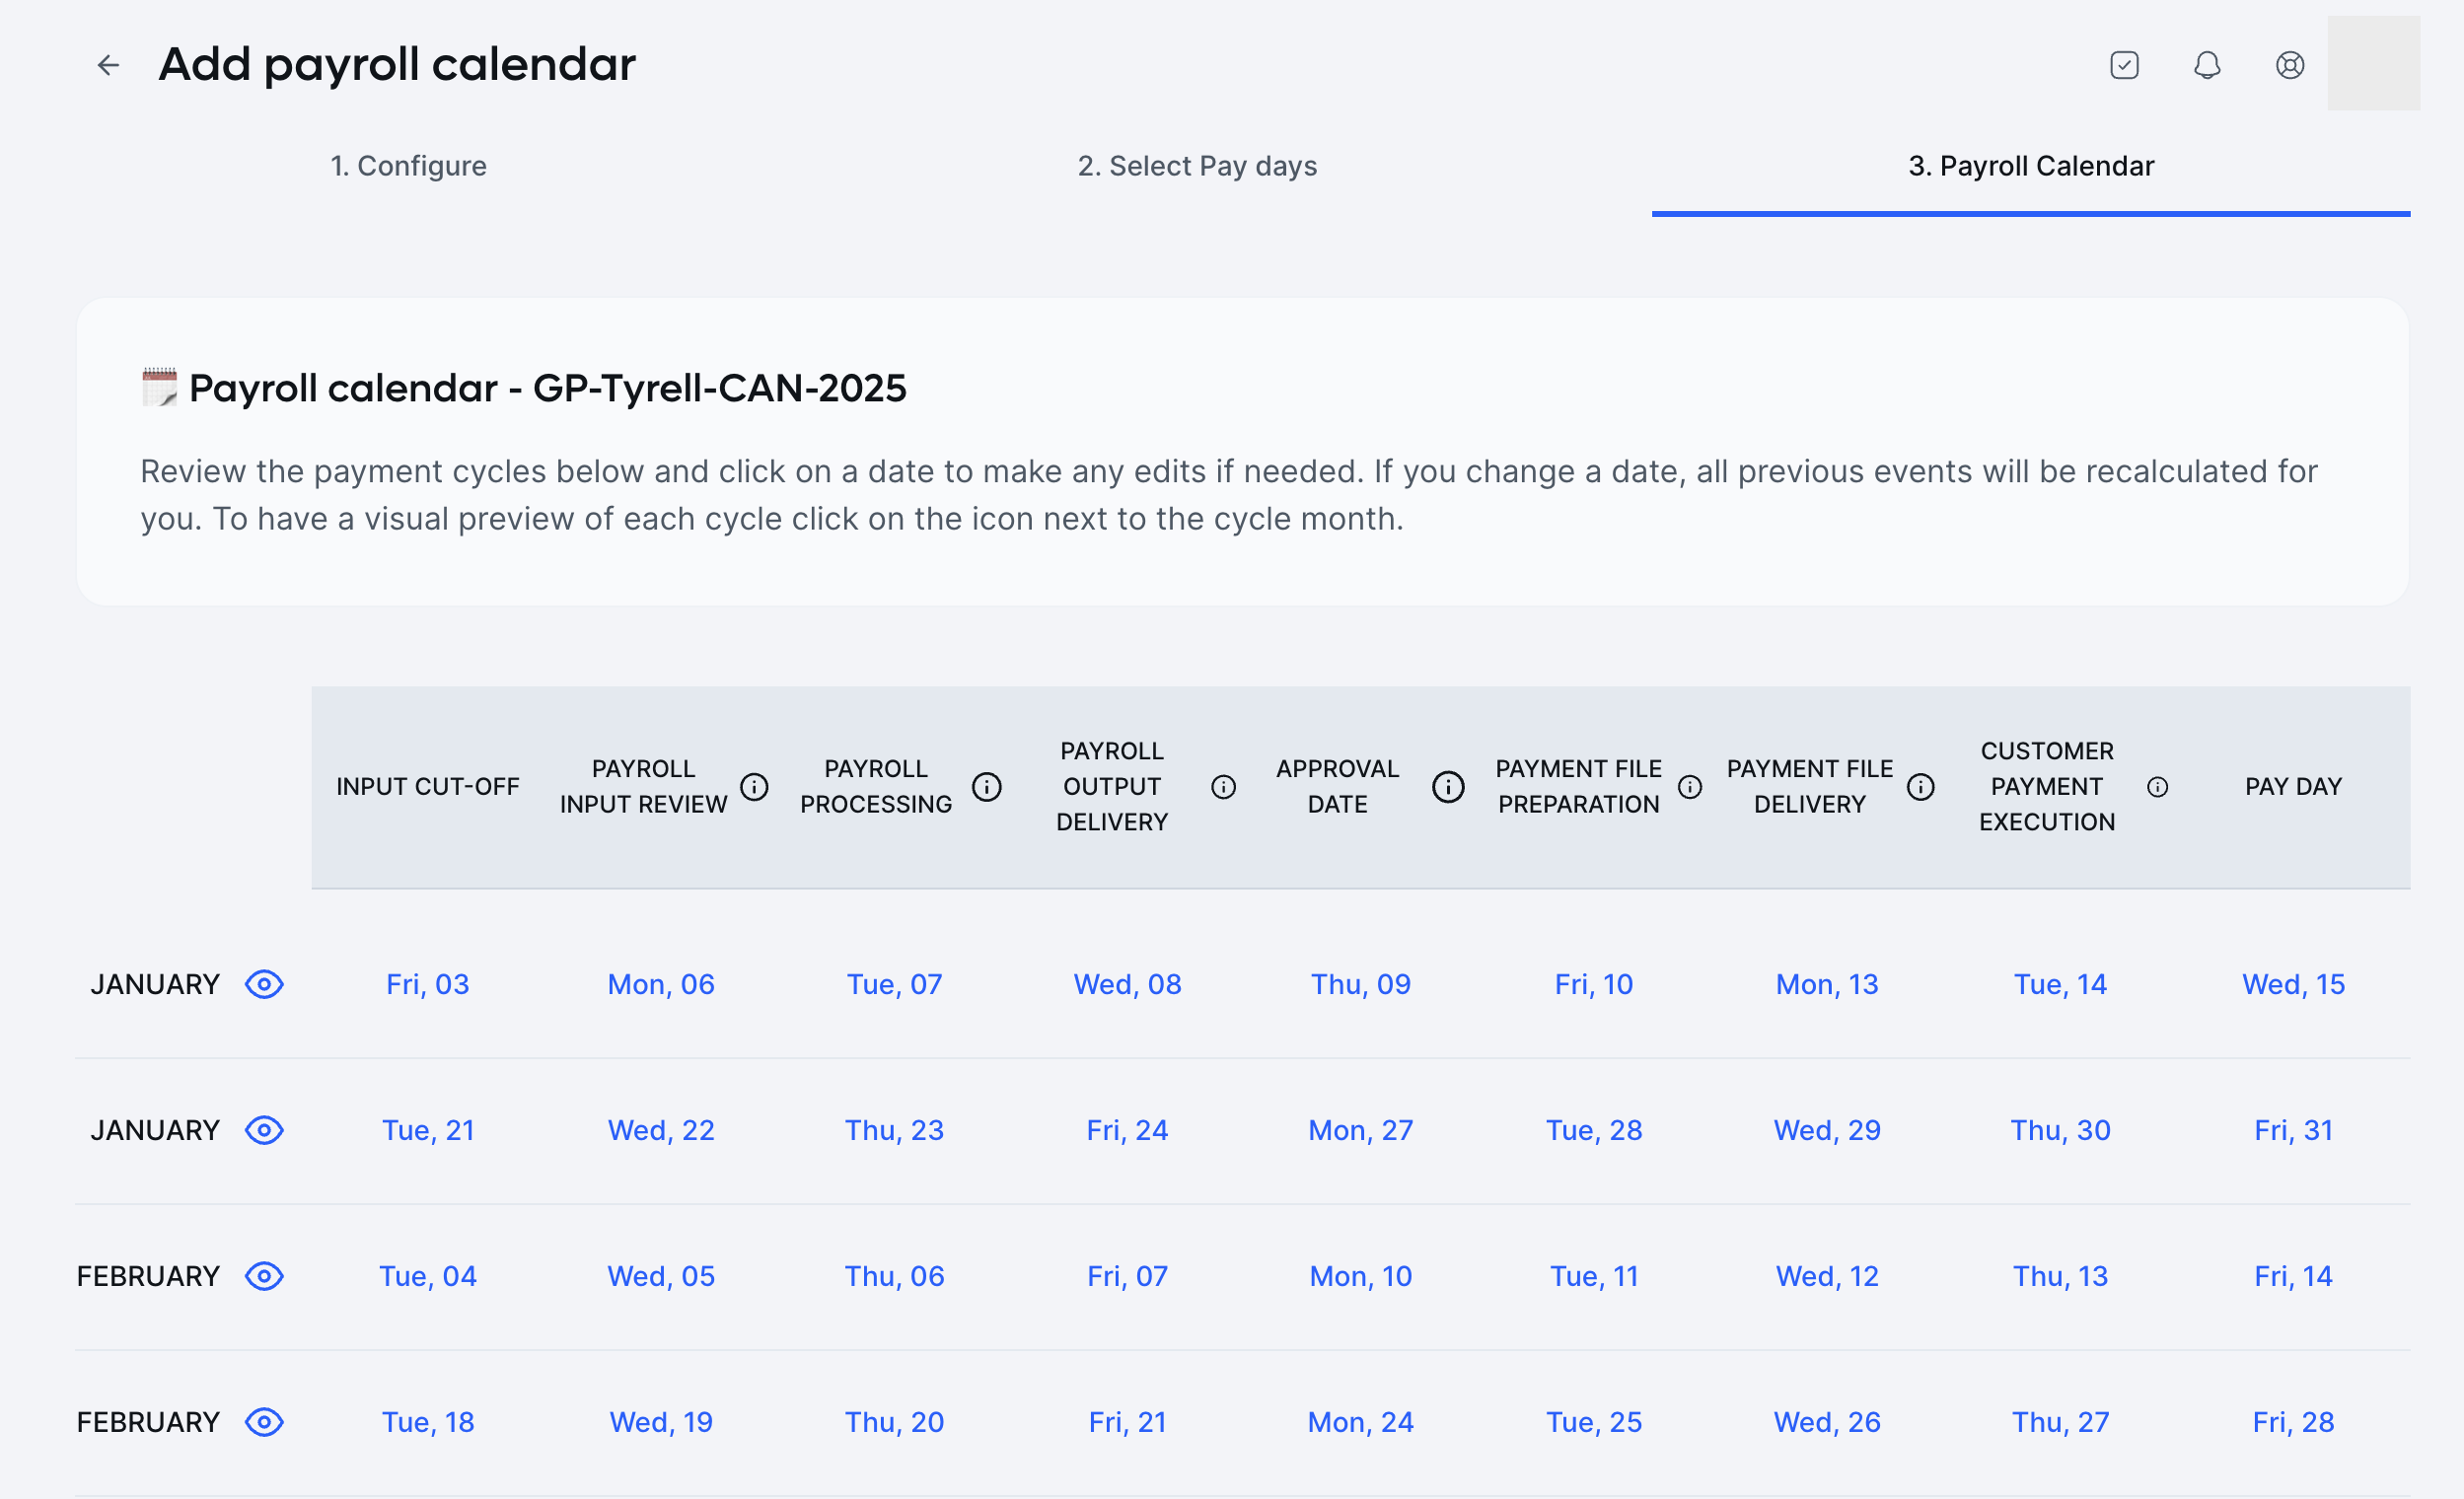
ℹ️ Note that each row is labeled with a month. The way this is calculated is, for example, if PAY DAY is Feb 14 and the INPUT CUT-OFF is somewhere in January, then the cycle will be labeled as FEBRUARY.
Click on the Save Payroll Calendar button to save this configuration.
Activate Payroll Calendar
When you save the payroll calendar, it will be saved as a draft. You can activate it right away by clicking the Activate button on the screen that pops up.
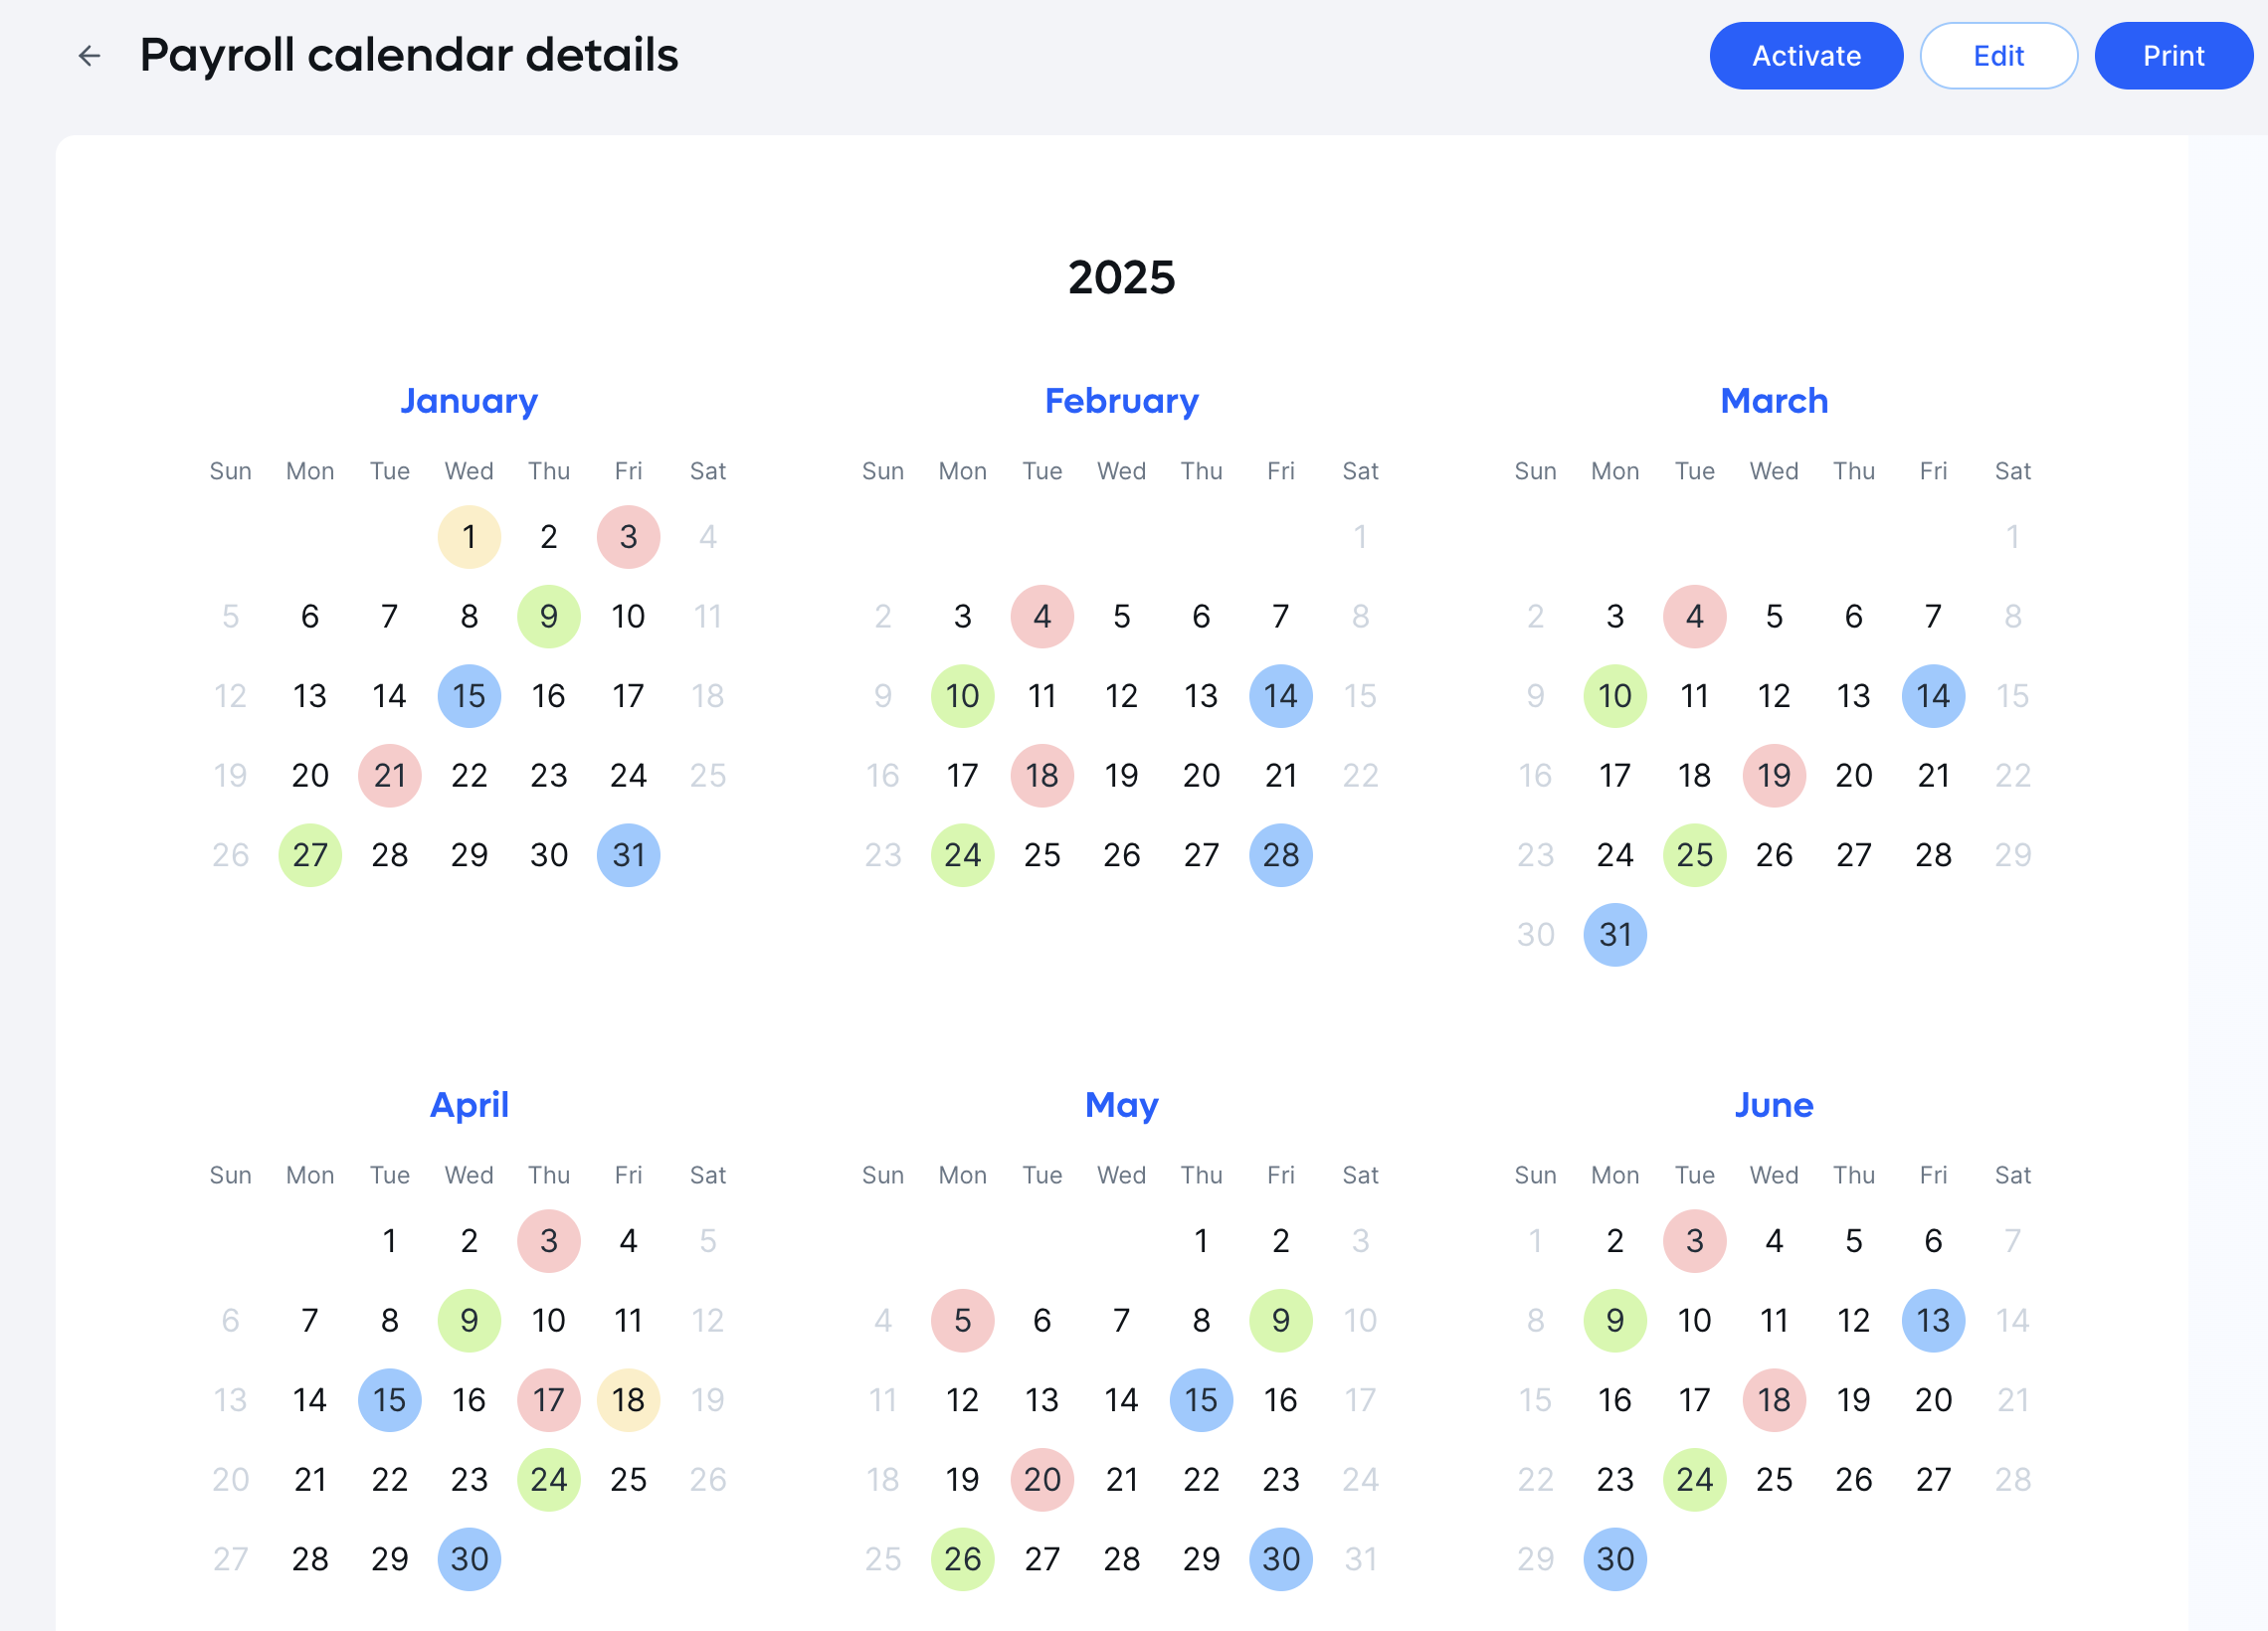
Or, you can activate it later by looking up the calendar name on the Payroll calendars page.
🗒️ On the Payroll calendar details page (refer to the screenshot above), you will notice multiple dates highlighted with different colors. Hover over these to see what they denote or scroll to the bottom of the calendar to find what each color represents. You can also add/remove events using the Event filter on the left panel.
Updated 2 months ago
Next, learn how to use the List Payroll Calendars endpoint using the API playground.